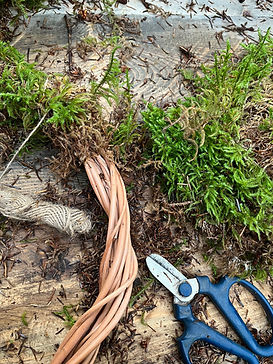
Wreath Guide
Step one
Begin by securing moss to the base. Wrap the twine around the moss, anchoring it firmly as you work your way around. This will form the green foundation of your wreath and help to keep the foliage hydrated.


Step two
Use a piece of twine and tie it securely around the moss base. This will act as the loop for hanging, so position it carefully to mark the "top" of your wreath.
Step three
Select your largest foliage, such as pine. Cut it into smaller, manageable pieces.
Place Foliage at an Angle: Insert the pine pieces into the moss at a slight angle, following a consistent direction for a natural, flowing look.
Distribute Evenly: As you go, make sure to add foliage to the inside, outside, and middle of the moss base for balanced coverage.
Tip - Cut the stem of the foliage at an angle as this makes it easier to push into the moss.


Step Four
For dried items with stronger stems, simply push them directly into the moss. For more delicate stems, use twine to tie them to the base. Tie the twine around the stem, then position it on the wreath and weave the twine through the foliage to anchor it from behind.
Step Five
Hold your wreath up or hang it to check for any gaps. Fill these with additional foliage as needed.
Flip the wreath over to check the back for any protruding stems that could scratch your door. Trim these down with scissors.


Step Six
To finish, use the bamboo pin to attach the velvet ribbon. Hook the pin around the ribbon, then press it firmly into the moss base in your chosen place.
Your wreath is now complete and ready to be displayed!